Community Training Classes & Labs > F5 Programmability Training Index
Lab 1.4: Basic Network Connectivity
![digraph breadcrumb {
rankdir="LR"
ranksep=.4
node [fontsize=10,style="rounded,filled",shape=box,color=gray72,margin="0.05,0.05",height=0.1]
fontname = "arial-bold"
fontsize = 10
labeljust="l"
subgraph cluster_provider {
style = "rounded,filled"
color = lightgrey
height = .75
label = "BIG-IP"
basics [label="REST Basics",color="palegreen"]
authentication [label="Authentication",color="palegreen"]
globalsettings [label="Global Settings",color="palegreen"]
networking [label="Networking",color="steelblue1"]
clustering [label="Clustering"]
transactions [label="Transactions"]
basics -> authentication -> globalsettings -> networking -> clustering -> transactions
}
}](../../_images/graphviz-221409330fdd39a8ab0c9a5047c5699f29958637.png)
This lab will focus on configuration of the following items:
- L1-3 Networking
- Physical Interface Settings
- L2 Connectivity (VLAN, VXLAN, etc.)
- L3 Connectivity (Self IPs, Routing, etc.)
We will specifically cover the items in BOLD above in the following labs. It should be noted that many permutations of the Device Onboarding process exist due to the nature of different organizations. This class is designed to teach enough information so that you can then apply the knowledge learned and help articulate and/or deliver a specific solution for your environment.
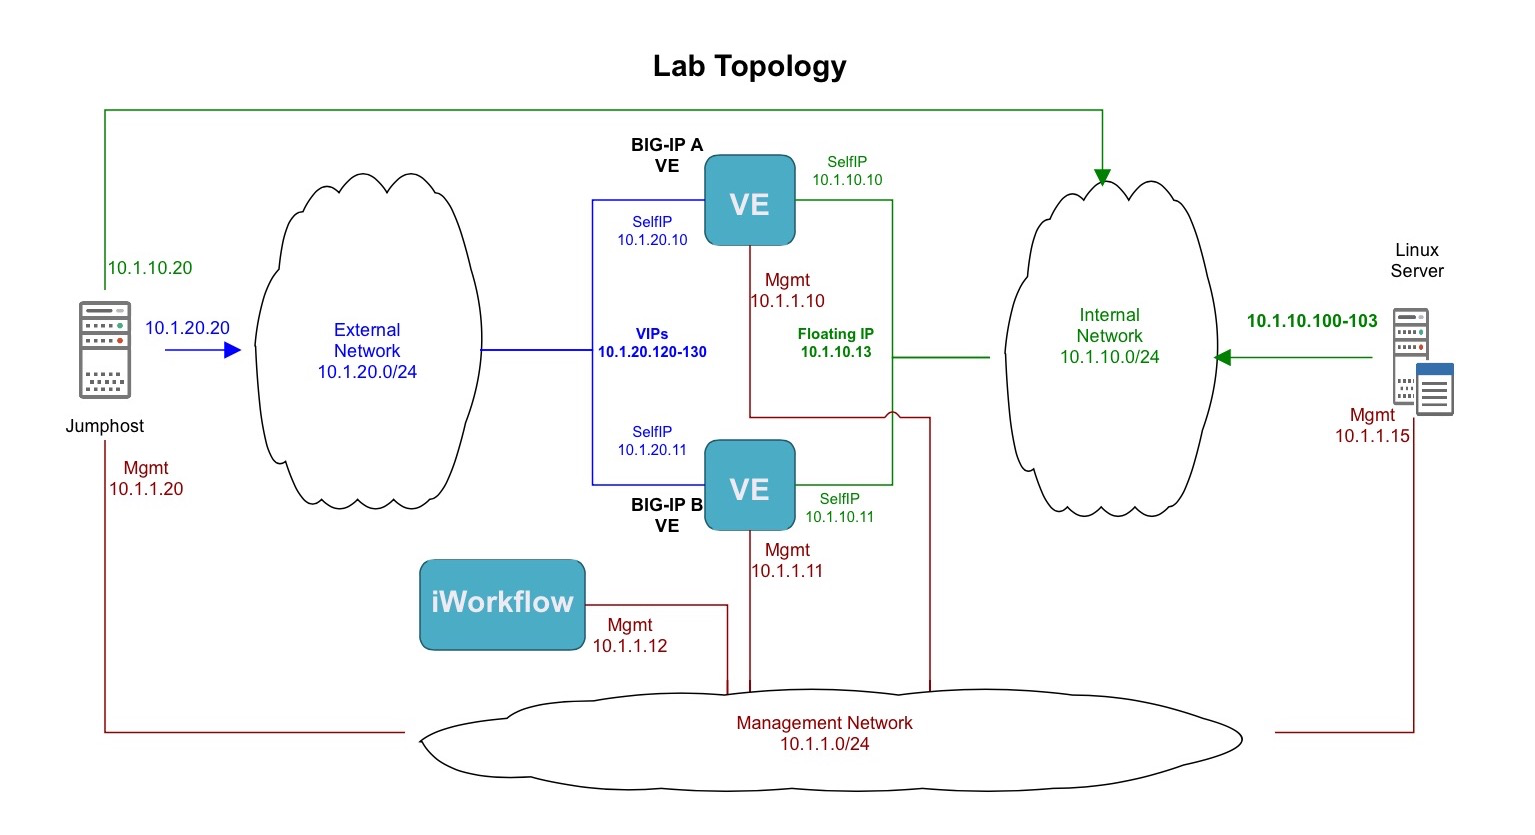
The following table and diagram lists the L2-3 network information used to configure connectivity for BIG-IP-A:
| Type | Name | Details |
|---|---|---|
| VLAN | Internal | Interface: 1.1 Tag: 10 |
| VLAN | External | Interface: 1.2 Tag: 20 |
| Self IP | Self-Internal | Address: 10.1.10.10/24 VLAN: Internal |
| Self IP | Self-External | Address: 10.1.20.10/24 VLAN: External |
| Route | Default | Network: 0.0.0.0/0 GW: 10.1.20.1 |
Task 1 - Create VLANs
Note
This lab shows how to configure VLAN tags, but does not deploy tagged
interfaces. To use tagged interfaces the tagged attribute needs
to have the value true
Perform the following steps to configure the VLAN objects/resources:
- Expand the
Lab 1.4 - Basic Network Connectivityfolder in the Postman collection. - Click the
Step 1: Create a VLANrequest in the folder. Click Body and examine the JSON request body; the values for creating the Internal VLAN have already been populated. - Click the Send button to create the VLAN
- Repeat Step 1, however, this time modify the JSON body to create the
External VLAN using the parameters shown in the table above. In order to do
so you can replace the following:
name:Internal–>Externaltag:10–>20interfaces[] --> name:1.1–>1.2
- Click the
Step 2: Get VLANsrequest in the folder. Click the Send button toGETthe VLAN collection. Examine the response to make sure both VLANs have been created.
Task 2 - Create Self IPs
Perform the following steps to configure the Self IP objects/resources:
Click the
Step 3: Create Internal Self IPrequest in the folder. Examine the JSON body; the values for creating the Self-Internal Self IP have already been populated.Note
The JSON body sets the VLAN to
/Common/Externalon purpose. You will modify this value in the steps below. Please do not change the value.Click the Send button to create the Self IP.
Click the
Step 4: Create External Self IPrequest in the folder and click SendClick the
Step 5: Get Self-Internal Self IP Attributesrequest in the folder and click the Send button. Examine the VLAN settings of the Resource. As noted above the Self IP has been assigned to the wrong VLAN (intentionally).Note
Postman has the ability to check the responses for specific values to verify if the result of a request is what it is expected to be. The :guilabel:
Test Resultsfor this request will show a failure for the[Check Value] vlan == /Common/Internalvalue. This is intentional and you should continue to the next section.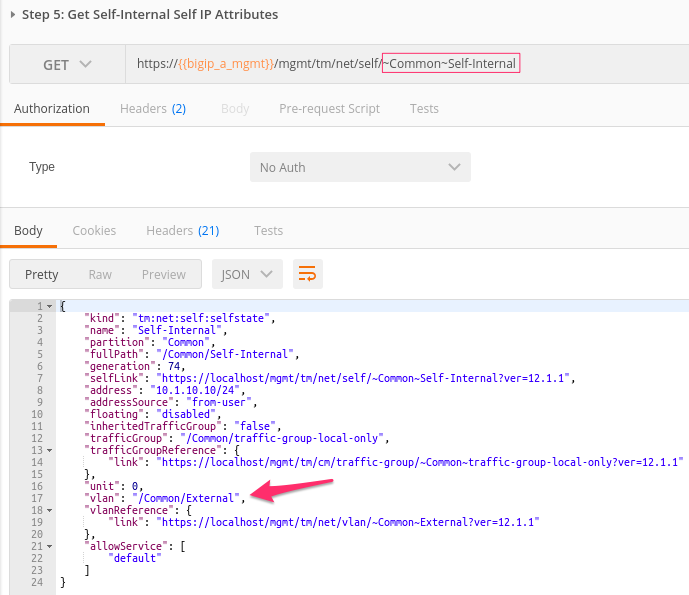
Task 3 - Modify Existing Self IP Resource
In order to modify an existing object via the REST API, the URI path has to
be changed. In the previous examples we used a POST to create Resources under
a Collection, therefore, the URI used was that of the Collection itself.
If you wish to update/modify a Resource you must refer to the Resource
directly.
For example, the Collection URI for Self IPs is /mgmt/tm/net/self.
The Resource URI for the Self-Internal Self IP is
/mgmt/tm/net/self/~Common~Self-Internal. Notice that the BIG-IP
partition and object name has been added to the Collection URI to for the
Resource URI.
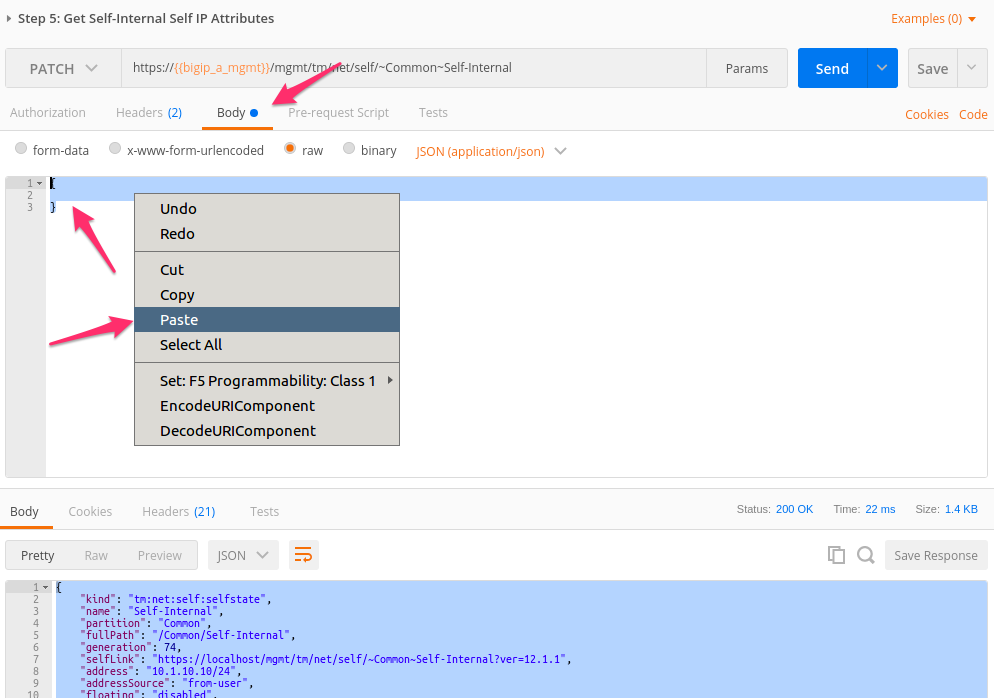
On the open
Step 5: Get Self-Internal Self IP Attributesrequest change the request method fromGETtoPATCH. ThePATCHmethod is used to modify the attributes of an existing Resource.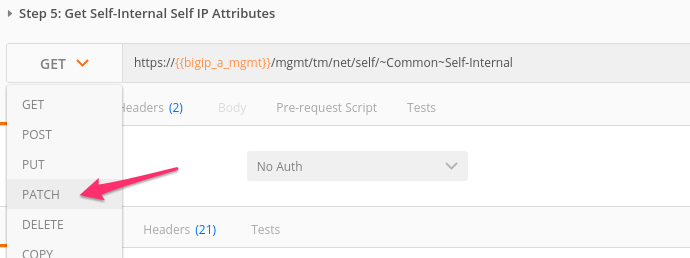
Copy the entire JSON RESPONSE from the previous
GETrequest.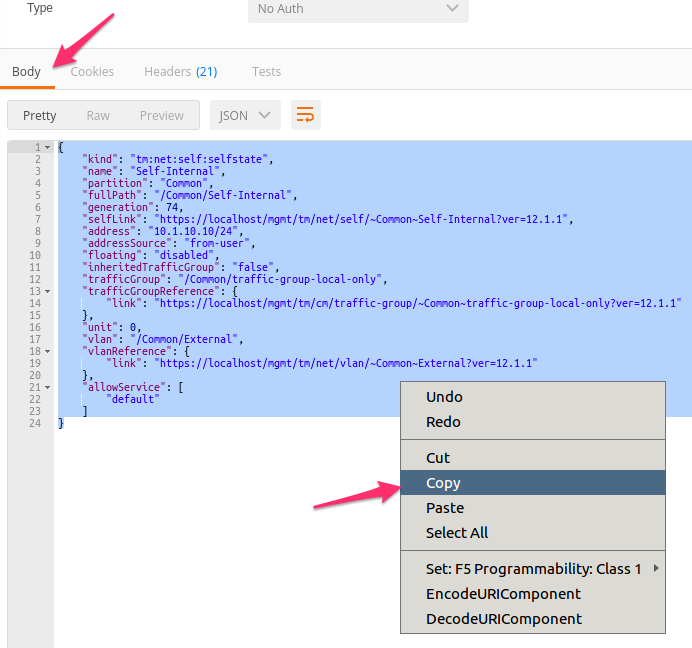
Paste the text into JSON Request body:
Note
Be sure to highlight any existing text and replace it while pasting.
In the JSON body change the
vlanattribute to/Common/Internaland clickSend: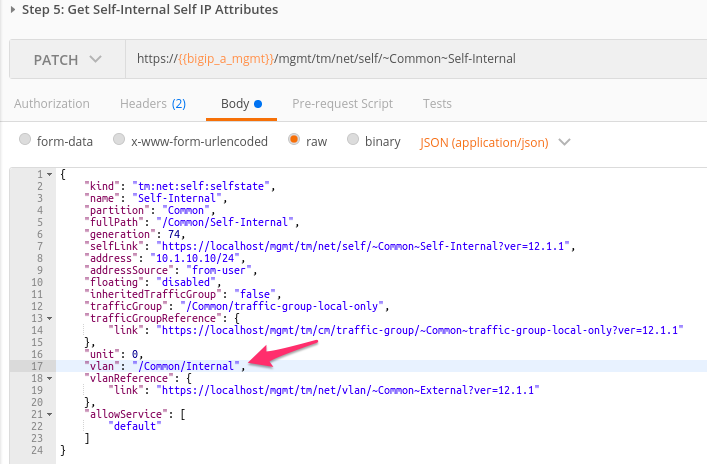
Click the
Step 6: Get Self IPsitem in the collection. Click theSendbutton to GET the Self IP collection. Examine the response to make sure both Self IPs have been created and associaited with the appropriate vlan.
Task 4 - Create Routes
Perform the following steps to configure the Route object/resource:
- Before creating the route, we double check the content of the routing table.
Click the
Step 7: Get Routesitem in the collection. Click theSendbutton toGETthe routes collection. Examine the response to make sure there is no route. - Click the
Step 8: Create a Routeitem in the collection. Examine the JSON body; the values for creating the default route have already been populated. - Click the
Sendbutton to create the route. - Click the
Step 9: Get Routesitem in the collection again. Click theSendbutton toGETthe routes collection. Examine the response to make sure the route has been created.